Teensy powered Apple mechanical keyboard
I learned to type sometime in the 80’s on a manual typewriter and presumably this is why I am fixated on mechanical keyboards. If you’re not much of a touch typist (or keyboard geek) you’re probably not aware that modern (inexpensive) keyboards are an abomination unto typing.
The IBM Model M keyboard is perhaps the most famous clicky keyboard with manufacturing spanning 1984 until the late 90’s and a company purchased the manufacturing line and still produces a variant to this day. Their enduring popularity and sometimes surprising price tag on the second hand market is testimonial to their design and build quality.
Modern day mechanical keyboards are manufactured and popular with typists, gamers, and aficionados. Das Keyboard offer undeniable quality for Mac, PC and Linux. They even offer an uber-geeky blank keycap variant to totally confound your visual based two fingered typing coworkers. Due to their specialist and somewhat niche market however these keyboards cost twenty times that of a cheap membrane keyboard.
History lesson and personal typing preference aside however I’m also a fan of retro computers so when I learned of a project to modify a keyboard from the late Steve Jobs NeXT computer company into a modern functioning USB device I was more than interested.
As I didn’t have a somewhat rare NeXT keyboard in my junk box I tracked down an older Apple mechanical Extended Keyboard II for a tenth of the price of a second hand Model M.
NeXT used a proprietary communication protocol to link their keyboard and computer, and early Apple did exactly the same thing with Apple Desktop Bus (ADB) – an early ancestor to our modern day device independent USB protocol.
Whilst there have been various commercial ADB to USB adapters produced over the years building one from scratch proved to be a much more satisfying experience.
After purchasing a Teensy 2.0 USB development board I downloaded the necessary software
- Teensy Loader
- Crosspack to compile on my Mac
- Source Code
I cannot thank the Geekhack crew enough for providing this source code for others to utilise. They saved me hours of reverse engineering and hardware sniffing and made this project a breeze.
Unlike the super-friendly Arduino IDE I had to manually build and compile my own firmware from the command line before flashing it to the device using Teensy Loader. Presumably because I was using a newer version of the compiler than the author I received a build error:
make: *** [obj_adb_usb/common/xprintf.o] Error 1
which was rectified by modifying the code in config.h to include a new conditional
/* key combination for command */

#ifndef __ASSEMBLER__

 #include "adb.h"

 #include "matrix.h"

 #define IS_COMMAND() ( \

     matrix_is_on(MATRIX_ROW(ADB_POWER), MATRIX_COL(ADB_POWER)) \

 )

#endif
Be sure to keep the original endif below the code block when pasting the patch.
Update 02/06/2014 Somehow I missed the Teensyduino extension which provides a more familiar GUI for those not wanting to experiment with the command line. Thanks Nantonos!
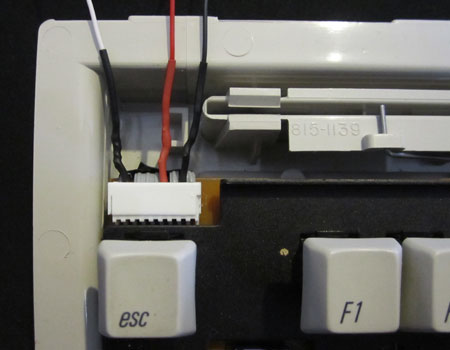
The Teensy board needed to be connected to the keyboard power 5v, ground, and signal. As I placed the board inside my keyboard case (now you see why size is important) I didn’t need any further modifications. Other people modifying this keyboard who placed a significant length of wire (such as an ADB cable) between the keyboard and Teensy needed a pullup resistor between the signal and power lines. I had to use a 1K resistor when testing using a breadboard and external cable, but after placing the Teensy inside the keyboard with virtually no wire length it became unnecessary.
Connect the keyboards ADB (data) pin 1 to Teensy pin F0, pin 3 to Teensy VCC (5v) and pin 4 to Teensy GND (ground). If you need a pullup resistor (in the 1-10k range, you may need to experiment) it will link ADB pins 1 and 3.
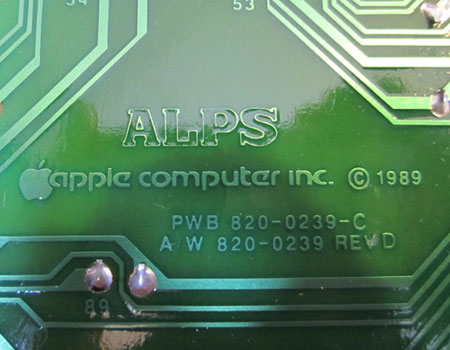
High quality ALPS keyswitches are what make all the difference
ADB socket removed, wires tapped in to the circuit board and heatshrunk ready to attach to the Teensy
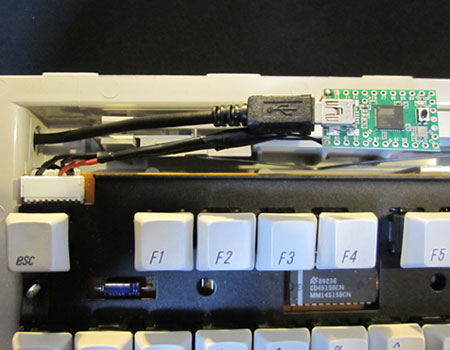
Teensy connected to USB and ready to be installed. I wrapped it in insulation and tucked it out of harms way.
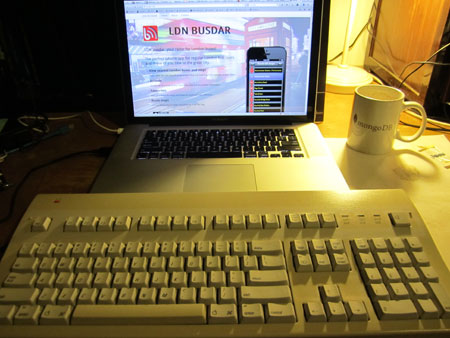
47cm wide and weighing in at 1.7kg. Amusingly the MBP it is attached to weighs 2.02kg.
I love the coloured old apple logo top left and whilst it certainly creates the distinctive clacking sound of a mechanical keyboard it is not unbearably loud and coworker irritating. Perhaps Jethro Carr could have used one and avoided the banning of his beloved Model M’s.
If you would like to hear the sound of this keyboard head on over to Shawn Blanc’s article.
Edit 17/02/2014 I have just made another of these keyboards as I’ve become accustomed to using them and felt I was missing out at while I was at work. I had a bit of difficulty tracing the ADB pin outs this time as it was a slightly different keyboard (Apple Extended) A great reference is the ADB Apple Desktop Bus pinout
Teensy powered Apple mechanical keyboard Read More »


 The problem began when both the green WiFi light on the DG834N (v1) ADSL/router stopped functioning and the ability to see the SSID being broadcast ceased. It seemed nothing had changed and during transport from one location to another it had simply died.